
Высококачественные измерительные решения для контроля качества на участках ОТК, на производстве, при входном контроле деталей и при опытно-конструкторских работах.
Gear Metering Pumps & Meter Mix Dispense Machines with highest accuracy for processing liquids and pastes.
High-precision rotary stroke bearings for backlash-free linear and rotational movements for use in machine and device construction.


Инновационный ручной измерительный инструмент Mahr: Штангенинструмент, микрометрический инструмент и индикаторы часового типа #96 как с цифровым отсчетным устройством, так и со шкальной индикацией, со встроенным беспроводным интерфейсом Integrated Wireless. Приборы для относительных измерений и образцовые меры Mahr являются незаменимыми инструментами для производственной метрологии.
From analog to digital, the entire spectrum of calipers. Easy handling, wireless, and highly accurate. Perfect for efficient use in manufacturing.

Штангенциркули с цифровым отсчетным устройством отличает надежность и простота считывания цифровой индикации, современный дизайн и точность, присущая приборам Mahr. Ассортимент включает измерительные приборы для всех областей применения. Различные интерфейсы передачи данных и степень защиты до IP67 обеспечивают выполнение любых требований.

Отсутствие бликов, затрудняющих считывание показаний, закаленная сталь, приподнятые направляющие для защиты шкалы от износа и высочайшая точность. Возможности качественного штангенциркуля Mahr и классического нониусного штангенциркуля.
Large, high-contrast dial and shock-protected measuring tool for lasting precision. A tried and tested mechanical design for fast and safe reading.

Maximum precision in a variety of designs. Micrometers from Mahr are available in conventional mechanical and digital and wireless versions.
A clear digital display, modern design and the usual Mahr accuracy characterize our digital outside micrometers. The range includes measuring instruments for all applications. Various interfaces for data transmission and a high protection rating up to IP 65 leave no demands unfulfilled.

Максимальная точность благодаря отсутствию бликов, затрудняющих считывание показаний, теплоизоляционным накладкам и точно доведенному микрометрическому винту. Возможности качественного микрометра Mahr.

Особенно хорошо подходит для надежного и быстрого контроля серийных деталей (валов, болтов/шпилек, хвостовиков). Быстрое и точное считывание линейных размеров с помощью измерительной головки.
Suitable for measuring large diameters and testing distances up to 2,500 mm
Available with scale or digital display or as a quick-measuring instrument with pistol-type grip. The Mahr 3-point inner measuring devices always provide reliable measuring results due to automatic self-centering.

From analog to digital, the entire spectrum of dial gages, dial comparators and dial test indicators. Easy handling, wireless (optionally), and highly accurate. Perfect for efficient use in manufacturing.

A clear digital display, robust construction and high Mahr accuracy characterize our digital dial gages. The range includes measuring instruments for all applications. Various interfaces for data transfer and a high protection rating up to IP 54 leave no demands unfulfilled.
Высокая чувствительность и точность благодаря надежному креплению измерительных осей, прецизионному передаточному механизму и измерительному стержню, устанавливаемому с высокой точностью

Высокая чувствительность и точность благодаря надежному креплению измерительных осей, прецизионному передаточному механизму и измерительному стержню, устанавливаемому с высокой точностью
Compared to analog dial indicators, Millimess dial comparators have even more precise components, providing better measuring accuracy and a much improved hysteresis error. These advantages are particularly evident in runout tests, straightness and flatness measurements and comparative measurements.
The high-precision inductive Millimess dial comparators are capable of digital increments of up to 0.2 μm. User-friendly operating functions such as tolerance monitoring, minimum or maximum recording for dynamic measurements, a combined numerical and scale display and simple data transfer make it an indispensable precision measuring instrument.
Чувствительное, оптимизированное с помощью ЭВМ средство измерения обеспечивает максимальную надежность и точность. Приборы, предназначенные для использования в жестких производственных условиях, оснащены циферблатом с закаленным минеральным стеклом, превосходно защищенным от царапин и повреждения, и уплотнением, обеспечивающим надежную защиту от проникновения жидкостей.

The sensitive computer-optimised measuring tool ensures maximum reliability and precision. For rough workshop use, the display is superbly protected. A seal also provides reliable protection against penetrating liquids.

Mahr 3D measuring probes for NC machines, machining centers and eroding machines shorten setup and downtimes. Perfect for accurately contacting reference edges on workpieces and fixtures.

Whether Integrated Wireless, external wireless modules, USB, Opto RS232, or Digimatic: Regardless of which interface standard you use, MarConnect will always provide the best connection.

Many Mahr precision gages have a data output with MarConnect interface. Regardless of which interface standard you use, (USB, Opto RS232 or Digimatic), MarConnect will always provide the best connection.
Семейство беспроводных приборов Mahr Wireless гарантирует точность результатов измерения и неограниченную мобильность. Современный и простой способ измерения без ограничений проводных технологий.
MarStand measuring tripods, measuring tables and radial run-out gages offer high stability, the basis for precise measuring results. They offer the necessary support for your dial indicators, dial comparators, dial test indicator measuring devices and measuring probes.

Measuring tripods provide the basis for precise measuring results due to their stable design. They offer the necessary support for your dial indicators, dial comparators, dial test indicator measuring devices and measuring probes.
Стойки и кронштейны MarStand используются для создания индивидуальных решений, обеспечивающих высокую устойчивость конструкции, что является необходимым условием для получения точных результатов измерения. Они предоставляют необходимые средства для проверки индикаторов часового типа, измерительных головок, рычажно-зубчатых индикаторов и измерительных щупов.

Measuring tables combine a precise and level measuring table, a stable measuring column and strong arm parts. MarStand measuring tables provide the basis for precise measuring results due to their extra stable design.
Radial run-out gages are the simplest method of detecting positional and form errors on shafts in a close-to-production environment. Due to the variety of models, the robust MarStand radial run-out gages form the basis for a wide range of workpiece requirements and precise measuring results.

Test plates made of hard granite are the perfect surface for your height measurement instruments due to the plates’ high strength and dimensional stability.
Using indicating gages as comparative gages make the perfect tool for precision measurements in manufacturing. Setting the gage to a reference standard reduces the deviation margin and minimizes the influence of temperature fluctuations on the measurement result.
Прецизионные индикаторные скобы — это идеальные приборы для точного измерения цилиндрических деталей, таких как валы, болты/шпильки и стержни. Особенно хорошо они подходят для быстрой и безопасной проверки серийных деталей. Быстрое и точное считывание линейных размеров с помощью измерительной головки.
Inner measuring devices are the perfect tools for precisely measuring the diameter, roundness and conicity of holes.

Наши толщиномеры представляют собой надежные и простые приборы для быстрого измерения параметров различных пленок, листов и пластин.

Когда обычные измерительные приборы, такие как штангенциркули или микрометрические нутромеры, невозможно использовать из-за геометрических особенностей детали, идеальным решением станут индикаторные приборы реечного типа!
Our depth gages offer a robust and simple range for particularly fast depth measurements. The 8mm mounting shaft allows the use of dial indicators, dial comparators and probes according to the measuring task.
Universal measuring instruments are the perfect partners for precision measurements in production, because the comparison measurement to a reference standard minimizes the influence of temperature fluctuations on the measurement result.
No matter whether gear, thread, taper or recess: Multimar universal measuring instruments are an ideal solution for almost all internal and external measurements for which standard measuring instruments are not suitable. A choice of basic units and an extensive range of accessories are available.
Точная регулировка приборов для измерения внутренних и наружных размеров. Приборы для настройки 844 S оснащены всем необходимым для выполнения любой измерительной задачи, в том числе и для приборов большой длины.

No matter whether centering shoulders, narrow collars or recesses: The Multimar 36B universal measuring instruments are an ideal solution for almost all inner and outer measurements. A choice of basic units and an extensive range of accessories are available.

Вы должны быть уверены в установочных мерах и приборах Mahr, ведь они служат основой для получения точных результатов измерений.
Trust in Mahr’s setting standards - because they are the basis for precise measuring results.

Mahr gage blocks ensure that you have high-quality reference and working standards at your disposal. Choose from four tolerance classes and two materials to suit the requirements of your workshop, production or quality assurance.
Mahr pin gages are available in three tolerance classes and various designs. Choose the device to suit the requirements of your workshop, production or quality assurance.

The requirements for electrical length measuring instruments are just as varied as their applications. Excellent reliability, precision and simple operation are called for.

The requirements for electrical length measuring instruments are just as varied as their applications. Excellent reliability, precision and simple operation are called for. Millimar compact and column measuring instruments meet these requirements.

Millimar length measuring instruments are compact, robust, and easy to use. They are versatile evaluation and indicating instruments for measuring tasks of manageable complexity in the production area and in the measuring room.
Разнообразные сочетания модулей и программного обеспечения позволяют создать рабочую среду и инструменты с высочайшей степенью адаптации к вашим требованиям.
Smart and universally applicable software for complex measurement tasks in the manufacturing sector
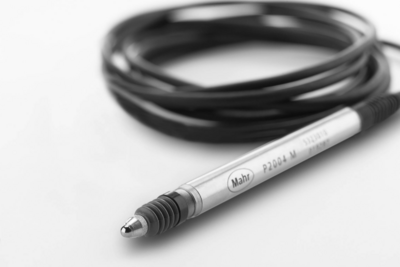
Millimar transducers are the most important components of a measuring chain. Their characteristics determine the quality of the entire measurement. Depending on the application, various technologies are available for this purpose. For example, Millimar inductive measuring probes: These products are rugged, versatile and attractively priced.

No matter whether thickness measurement, radial runout or concentricity: With the inductive probes you can record measured values and deviations independent of shape, support or radial runout deviations. Their great advantage is the large linearity range and the relative insensitivity to interference. The probes are mainly used for comparative measurements in production, but the specific tasks of the sensor can vary.

Pneumatic length measuring instruments are characterized by their high accuracy and long-term stability. Non-contact measurement with measuring nozzles does not damage the workpieces. Even workpieces that are uncleaned, oiled, lubricated or coated in lapp

Millimar length measuring instruments are compact, robust, and easy to use. They are versatile display and evaluation devices for measuring tasks of manageable complexity in the production area.

Measurement results are displayed on 101 three-color LEDs and can easily be read from a distance. If the programmable warning and tolerance limits are exceeded, the segments change colors from green to yellow or red.

The Millimar pneumatic measuring devices quickly and accurately record dimensional deviations. It has proven itself for many years in the industrial production and measuring room.
For measurement and evaluation on the go.

Non-contact measuring, using pneumatic measuring rings, no damage to the workpieces.
Adapt the measuring station to your measuring task with the accessories for air measuring technology.

Trust in Mahr’s setting standards - because they are the basis for precise measuring results

Setting of pneumatic measuring instruments (nozzle ring gages) Meticulously hardened, aged, ground and lapped.
Setting of pneumatic measuring instruments (nozzle plug gages) Meticulously hardened, aged, ground and lapped.

Want to aim high with your measurements? Digimar is the one for you!

For scribing and marking workpieces in the workshop. Easy measurement of heights and distances.

Touch operation, ergonomic handling and a wide range of evaluation options: This is what the Digimar 816 CLT height measuring device stands for.

Touch operation, ergonomic handling and a wide range of evaluation options: This is what the Digimar 817 CLT height measuring device stands for.
Precision length metrology stands for high-precision dimensional metrology – for both absolute and relative measurements.

Простые в использовании универсальные приборы для измерения длины и настройки средств измерения в производственных условиях

Простые в использовании универсальные приборы для измерения длины и настройки средств измерения в производственных условиях
Due to the wide product range from the simple gage block test stand, fully automatic dial gauge test stand, and the ULM devices to the ultra-precise and partially automated CiM universal measuring machine, Mahr always offers a practical solution for production, measuring rooms and calibration laboratories. In other words: Maximum precision combined with extremely efficient measuring processes.

Классические приборы ULM или приборы PLM и CiM с электроприводом. Универсальные приборы Mahr для измерения длины — это удобство, скорость и надежность измерений с минимальной неопределенностью.

Полуавтоматическая и полностью автоматическая проверка индикаторов часового типа, рычажно-зубчатых индикаторов, измерительных головок и щупов, обеспечивающая эффективность и точность.
Полуавтоматическая и полностью автоматическая проверка индикаторов часового типа, рычажно-зубчатых индикаторов, измерительных головок и щупов, обеспечивающая эффективность и точность.
Manual testing of dial gages, dial test indicators and comparators - easy and precise

Trust in Mahr gage block comparators - because they are the basis for the precise testing of your standards
Microscopes are used in almost all industries for the quick inspection of distances, radii, and angles. In the laboratory or close to production.
Измерительные микроскопы
Surface metrology for industry and research

Structured functional surfaces with strict tolerances require high-precision measuring systems that record the topography of a workpiece or object over a short area in a minimum of time.

Contour measurement technology is used to determine rough shape deviations.


Precisely measure contours with optical measuring instruments
Contour and roughness measurement combined: The professional allrounder
Contour and roughness measurement combined: The professional allrounder

2D/3D Contour measurement as well as roughness measurement acc. to ISO 25178 / ISO 4287
3D surface metrology for industry and research
Measure everywhere with mobile measuring devices!

Measuring stations for the measurement of high-precision lenses
When standard solutions are no longer enough: Individual customized solutions

Structured functional surfaces with strict tolerances require high-precision measuring systems that record the topography of a workpiece or object over a short area in a minimum of time.

Versatile and powerful in measuring rooms and laboratories
Contour and roughness measurement combined: The professional allrounder
Tactile measuring stations for contour & roughness measurements

2D/3D contour and roughness measurement acc. to ISO 25178 / ISO 4287
3D surface metrology for industry and research
Measure everywhere with mobile measuring devices!
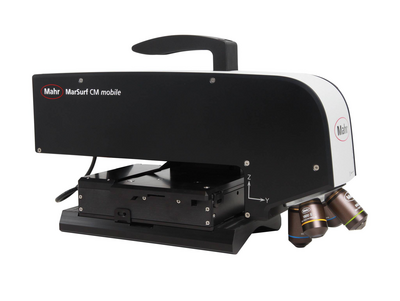
Mobile 3D surface metrology for
use on-site
Mobile measuring instruments let you measure exactly where you need the results.

Measuring stations for the measurement of ultra-high sensitivity lenses
When standard solutions are no longer enough: Individual customized solutions
Metrology
Experience outstanding features combined with extreme flexibility in workpiece size and increase your productivity in the production environment.
Flexible measurement of workpieces that can be clamped between centers
High resolution and very fast matrix camera for measuring a large number of features on rotationally symmetrical workpieces.
Fast optical matrix camera in combination with high-precision touch probes for measuring a large number of features on rotationally symmetrical workpieces.

Flexible clamping options and high-precision alignment using a fully automatic centering and tilting table
High resolution and very fast optical matrix camera for measuring a wide range of rotationally symmetrical workpieces. Addition of a fully automatic centering and tilting table for extremely fast, mechanical alignment and flexible clamping options.
Fast optical matrix camera in combination with high-precision touch probes for measuring a large number of features on rotationally symmetrical workpieces. Addition of a fully automatic centering and tilting table for extremely fast, mechanical alignment, flexible clamping options and, for example, internal measurements.

Systems for measuring form and position tolerances, such as roundness, flatness, straightness and coaxiality. From manual to fully automated.

The device measure features such as roundness, straightness and concentricity simply, cost-effectively, and yet with high precision. Our manual form measuring instruments are suitable for both the measuring room and for measurements close to production.
With our automatic form measuring systems, you reduce your process costs, but without driving up inspection costs - through stable, innovative devices with the highest level of automation, flexibility and accuracy.
Metrology
Experience outstanding features combined with extreme flexibility in workpiece size and increase your productivity in the production environment.

Flexible measurement of workpieces that can be clamped between centers

Flexible clamping options and high-precision alignment using a fully automatic centering and tilting table
Optical and tactile shaft measurement systems for use in harsh manufacturing environments. Complete measurement of all common rotationally symmetrical workpieces.
.Universal, fully automatic and robust optical shaft measuring devices for use in harsh production environments.
Optical-tactile shaft measurement devices for use in harsh manufacturing environments. Complete measurements of all common rotationally symmetrical workpieces.
Metrology
Experience outstanding features combined with extreme flexibility in workpiece size and increase your productivity in the production environment.

Flexible measurement of workpieces that can be clamped between centers

Flexible clamping options and high-precision alignment using a fully automatic centering and tilting table

From highly specialized gear analyses to fully integrated series measurement - Mahr is your reliable partner at every level of modern gear and gearbox manufacturing.
Measure your product at the point of origin - including rapid feedback to the manufacturing process in order to avoid waste.

Wide range of technologies and products for fast and non-contact recording of surfaces and geometries.
Измерительные микроскопы
Determination of roughness, contour and many other surface parameters.

Surface metrology for industry and research
Minimal roughness accurate to the nanometer
Optical analysis of surface topographies and geometries

Surface metrology for industry and research
Refurbished systems in proven Mahr quality
Using Air Gaging for Measurement of Orthopedic Devices
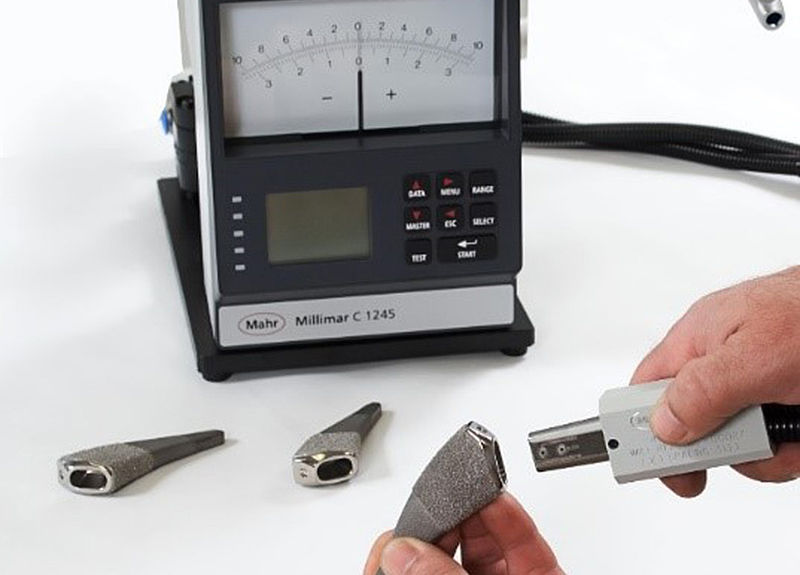
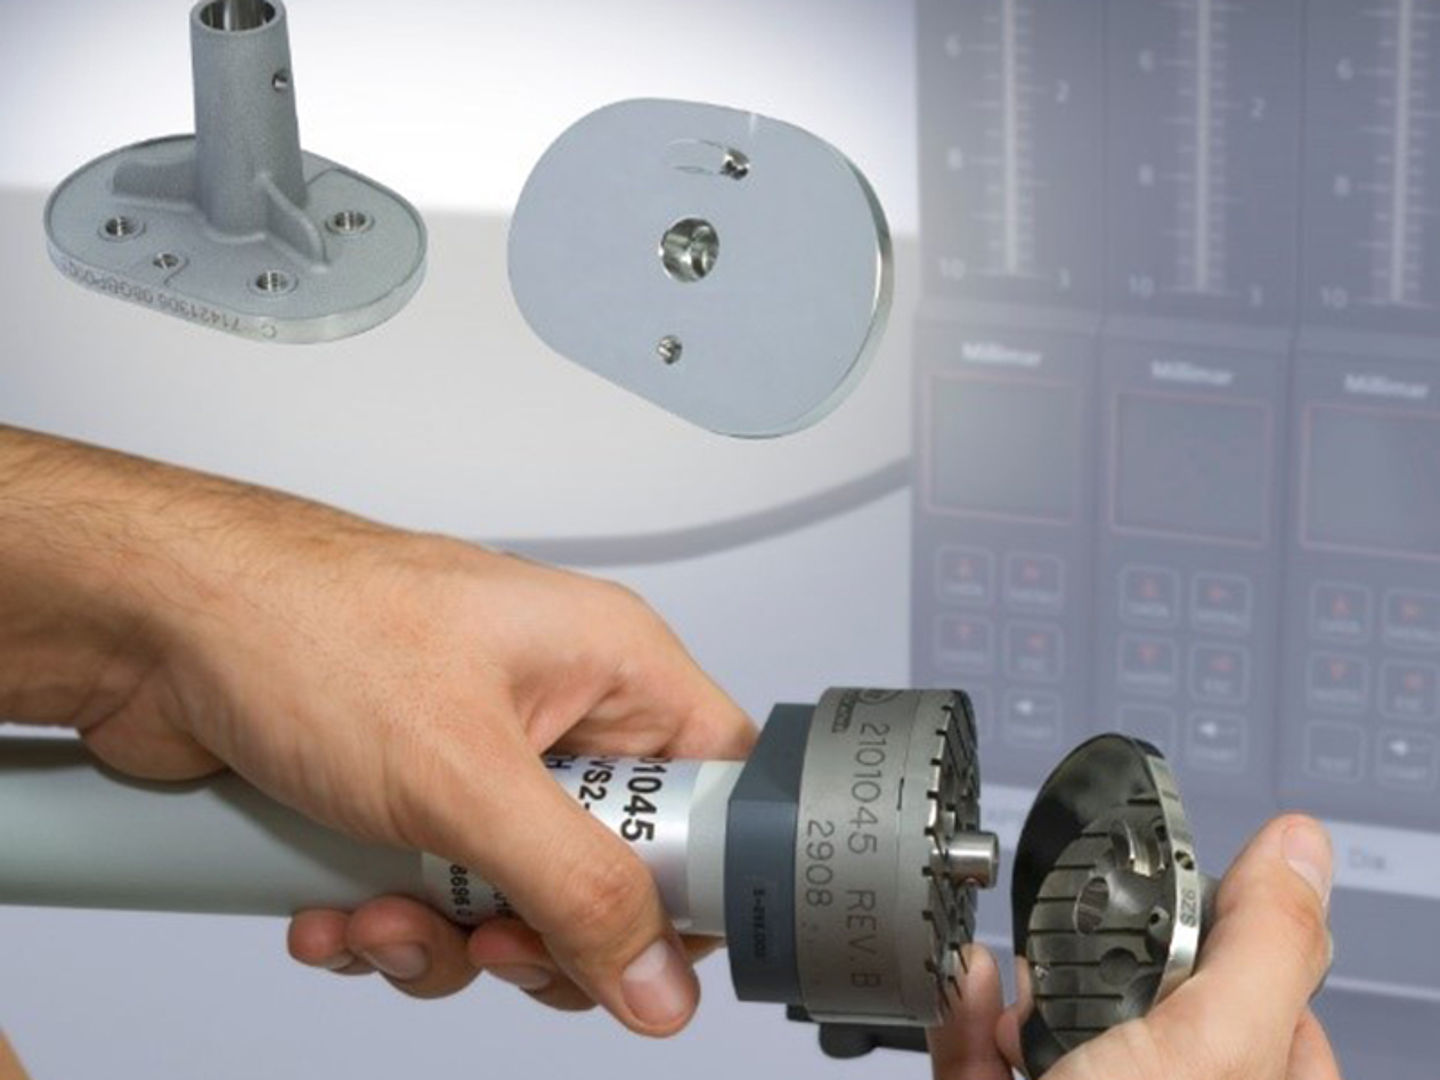
Precision orthopedic components can only meet the necessary high-quality standards when the individual manufacturing steps (starting with cutting and ending with final machining) are consistently stable. This requires process-oriented inspection of characteristics, rapid feedback when tolerances have been exceeded, and documentation of all process data.
Typically, as parts move through the manufacturing process from raw material to final product, dimensional tolerance, surface finish, and geometric characteristics become more critical. One of the dimensional characteristics that is measured at the end of the orthopedic device manufacturing process is the tight tolerance on the tapers used to match the parts together. For example, most hip and knee implants use tapers to provide optimal alignment and to “lock” the components into position. During the manufacturing of these devices, control of both taper and size determines how well the orthopedic implants will perform over their lifetime.
Why Air Gaging is the Most Effective Method
As tolerances become tighter, gages must be more robust, have the right design characteristics to fixture the parts properly, and have the proper resolution and accuracy to measure the required tolerances. Increasingly, air gaging has become the inspection tool of choice for controlling these critical parameters. Air gaging is extremely precise and provides very high resolution. It is typically used for applications where the tolerance is fairly tight — usually less than ±0.001 in. — and surface roughness is less than 50 µin. Ra. When these conditions exist, as with precision medical tapers, air gaging is often the best solution for the application.
Air gaging is also particularly well suited to checking dimensional relationships. Furthermore, air gages are fast, easy to use, and can last for years — measuring millions of parts — under the toughest shop conditions. Air gaging can even be used in some cases to inspect and estimate certain form features on a part.
The air jet, the small orifice that emits air to begin the physical process of creating a gage, is the reason that air gaging is so useful for measurement of orthopedic tapers. No other gaging sensors are as small or can be placed in such close proximity when measuring multiple diameters or geometric forms. Small electronic sensors or eddy current type sensors may approach the size of an air jet, but nothing can match their economy or ability to work in a shop environment at the point of manufacture.
It is possible to measure diameter and taper with either a combination of electronic sensors or coordinate measuring machines (CMMs) with touch probes. However, the air jet can be built in a precision tool that can be used to measure the part at the point of manufacture. This can be done in one fast measurement with very little operator involvement. Neither CMMs nor optical gaging have the speed and the precision required to measure 100 percent of parts on the shop floor while providing immediate feedback on the performance of the process.
Selecting the Right Gage Design
Just as there are many manufacturers of taper components, there are many methods for specifying taper requirements. The reference face may be different between manufacturers and tolerances can be specified in different ways.
Depending on how the assembly goes together, tolerances may be tighter on the taper than on the diameters, or vice versa. Alternatively, there may be a combination of taper tolerances on only one diameter. Thus, the specification on the print is the best guide in choosing which air taper gage design to use. With air gaging, the tooling is made specifically for each different taper application, so it is critical to properly understand the requirements.
Even so, the flexibility and benefits are hard to beat. Air gaging provides very high resolution and uses a sensor that is 0.050 in. or smaller; sensors can be placed within 0.10 in. of each other and can be combined to produce any number of dimensional and geometric results right on the shop floor.
Types of Air Taper Gages
Medical implants must be extremely durable and able to withstand a lot, so the taper fit between the female and male components is critical. The two pieces have to lock together and sit at the correct height. During manufacture, it is common to inspect 100 percent of parts to ensure the accuracy of both components. This is usually done with differential air gaging, which combines the necessary high resolution and accuracy with the speed, ease of use, and ruggedness required on the shop floor.
The most common type of air gage taper tooling has two pairs of jets on opposing air circuits and is designed for a “jam fit” between the part and the tool (see Figure 1). If the rate of taper is too great, there will be excessive clearance between the two surfaces at the small end of the taper. If the rate of taper is too small, there will be excessive clearance at the large end.
Either situation can reduce the rigidity of the connection, which over time can cause the “lock” to fail by becoming loose and/or rotating. If the taper angle is correct but the size is incorrect, then the overall length of the orthopedic assembly will be incorrect and provide unexpected results after implant.
Jam-fit tooling does not measure part diameters. Rather, it displays the diametrical difference at two points on the workpiece, as compared to the same two points on the master. If the difference in diameter at the large end of the taper is greater than the difference in diameter at the small end, the upper jets will see more back pressure than the lower jets. This will reflect negative taper, or a larger taper angle. If the diameter difference at the small end is greater, the reverse is the case and the gage will read positive taper.
However, because a differential air meter displays diametrical differences only, it will not display the part’s diameter at either location. So, while this type of air tooling provides a good indication of taper wear and allows a loss of rigidity in the connection, to be predicted it does not tell anything about the taper components’ positioning accuracy.
For that, a clearance-style (sometimes referred to as a shoulder style) air tool is needed in which an air taper ring cavity is sized to accept the entire taper part. Depending on where the part’s reference surface is, the part can be referenced on the end of the taper or on a flange (shoulder) against the top surface of the part. This makes it possible to measure diameters at known heights (in addition to the change in clearance, as with the jam-fit type). An additional set of jets may be added to inspect for bell-mouth and barrel-shape, two more conditions that reduce the contact area between the male and female components.
The third type of air taper gage is a cross between the aforementioned styles. This is called a simultaneous fit taper gage. It is essentially a jam-fit air tool with an indicator that references on the face of the datum surface. This indicates how far the air tool goes into the part being measured.
So, while the air gage provides a reading of the taper angle, the indicator provides an indication of the size of the diameters. When measuring a female taper part, if the taper diameter is too large, the gage will go farther into the part. If the diameter is too small, it will not drop into the part as far as expected.
Accounting for Surface
Because air gaging is so precise and high resolution, it can be influenced by the surface finish of the part. Some parts have designer surface finishes that would normally not be conducive to air gaging. For example, measurements of a prosthetic femoral stem include the roughness of the polished area found on the proximal portion of the stem. This area is subject to close visual inspection for asperities by the orthopedic surgeon. To verify surface and waviness quality of the taper, a contour gage is used to trace the taper in the same measurement.
This causes complications for the application of air gaging as a good surface is necessary to utilize it. During normal use, the air jet’s curtain of air covers an area on the surface of the part. This air curtain is restricted by the surface to create the back pressure, which is required to do the measuring. On a smooth surface, the difference between the average surface and the peaks, which in the case of an ID part means minimal clearance, is fairly insignificant. But if the surface is very rough, the area, or the point at which the back pressure is built up, can be significantly different. This can register on the air gage display and affect the indicated diameter.
However, when there are surface finish issues special steps can be taken to account for them. As long as the surface finish is less than 50 microinches, the offset can normally be ignored. Even if it is not, if the effect is discovered during process development, the error can be compensated for and the effective diameter shown to the machine operator. By understanding the nature of the surface and how it reacts to the open-air jets, electronic amplifiers and gaging computers can also provide excellent calculations of average or maximum diameters.
Conclusion
Precision orthopedic components must consistently meet extremely high-quality standards. One of the critical dimensional characteristics that is measured during the orthopedic device manufacturing process is the tight tolerance on the tapers used to match the parts together. As tolerances become tighter, gages must be more robust, have the right design characteristics to fixture the parts properly, and have the proper resolution and accuracy to measure the required tolerances. Increasingly, air gaging has become the inspection tool of choice for controlling these critical parameters.
This article was written by George Schuetz, Director, Precision Gages at Mahr Inc., Providence, RI.
